


.png)


Triggering the Consolto widget programatically
You’re installing Consolto but prefer triggering the widget using your own frontend code.
The widget can trigger one of the following six actions:
- Open widget ==> open-widget
- Start chat ==> start-chat
- Start video call ==> start-call
- Start audio call ==> start-audio-call
- Start scheduling ==> start-scheduling
- Start contact form ==> start-form
- Close widget==> close-widget
IMPORTANT NOTE: Before you continue, please note there are separate instructions for “Multi-agent” and “Single-agent” widget.
If you embed the script from the “Team Center” in your website (available in our Enterprise plan), use the “Multi-agent widget” instructions.
Path 1: Single-Agent widget
Example:
window.addEventListener('consoltoEvent', (e) => { // Listen to events sent from Consolto
if (e.detail.consoltoReady) { // Will be true only when Consolto becomes ready
var event = new CustomEvent('consolto_h2w', { // Create a custom event that will be dispatched and trigger one of the actions.
detail: {
'et-click-type': 'open-widget', // One of the 5 available actions
},
});
window.dispatchEvent(event); // Here we programmatically trigger the Consolto widget
}
});
Explanation:
- To start an action programmatically, we first need an indication Consolto is ready. List to a consoltoEvent where the detail.consoltoReady equals true.
- Create a new CustomEvent of type "consolto_h2w" -- host to widget if you stumbled upon the abbreviation :) Make sure to indicate which action should be triggered by adding the et-click-type as above.
- Dispatch the event and it will trigger the Consolto widget. In the example above we've triggered this immediately after the page loads. Feel free to trigger this at a later stage.
Path 2: Multi-Agent widget
Example:
window.addEventListener('consoltoEvent', (e) => {
if (e.detail.consoltoReady) { // need to wait until Consolto is ready
const event = new CustomEvent('consolto_h2w', { // dispatch an event that will trigger one of the actions.
detail: {
'et-click-type': 'open-widget',
'et-agent-id': '13213212313131',
},
});
window.dispatchEvent(event);
}
});
Explanation:
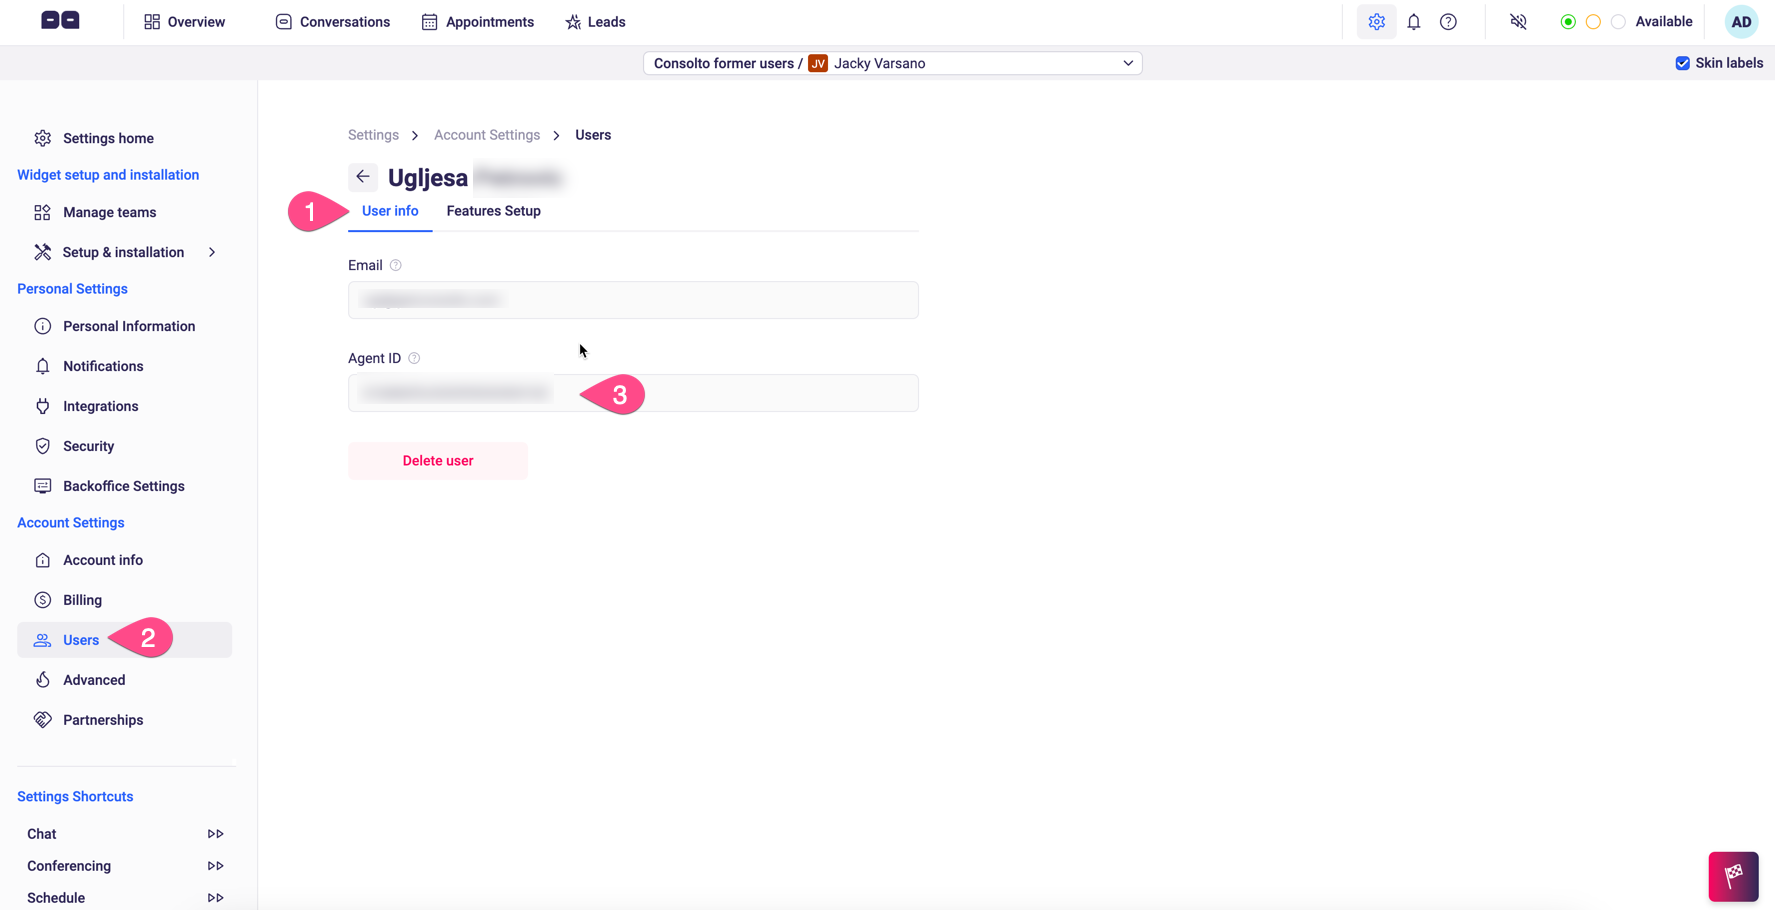
- The main difference between the multi-agent and the single-agent triggers is the agentId that needs to be added to the customEvent. The agentId can be found in the Consolto-backoffice, under the Team Center ==> Agents ==> Specific agent ==> agentId (3 in the image below).
- If you'd like to start a specific skin, use the skin id found in the

- To start an action programmatically we first need an indication Consolto is ready. Listen to a consoltoEvent where the detail.consoltoReady equals true.
- Create a new CustomEvent of type "consolto_h2w" -- host to widget if you stumbled upon the abbreviation :) Make sure to indicate which action should be triggered by adding the et-click-type as above.
- Dispatch the event and it will trigger the Consolto widget. In the example above we've triggered this immediately after the page loads. Feel free to trigger this at a later stage.
Notes
- To open the widget on the list of agents (rather than a single agent): use the open-widget action and data-et-agent-id="multi". Otherwise, provide the agentId.
- IMPORTANT: To select a random AVAILABLE agent, put et-agent-id="AVAILABLE"
- If things don't work as expected - double check that the agentId you provided is right.
Q&A:
Q: How can I select an available agent programmatically?
A: in the et-agent-id field, put "AVAILABLE"


.svg)
.svg)
.svg)

